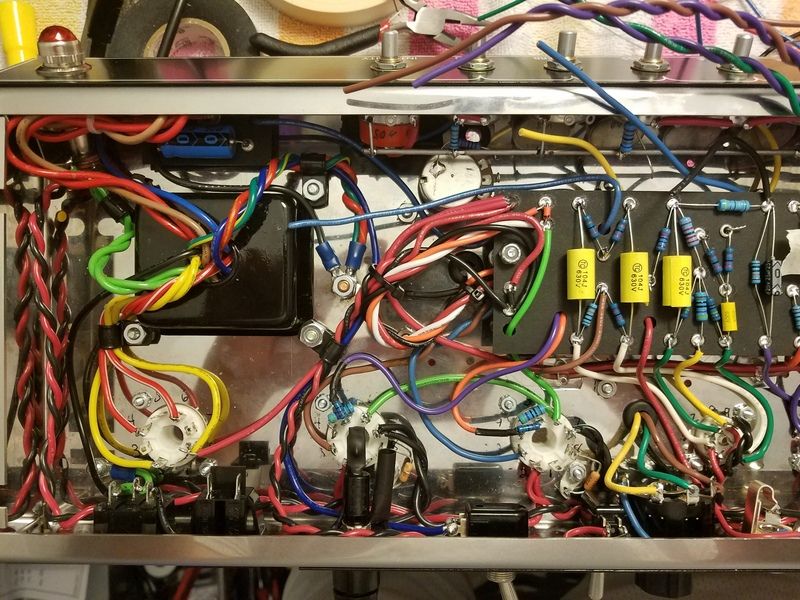
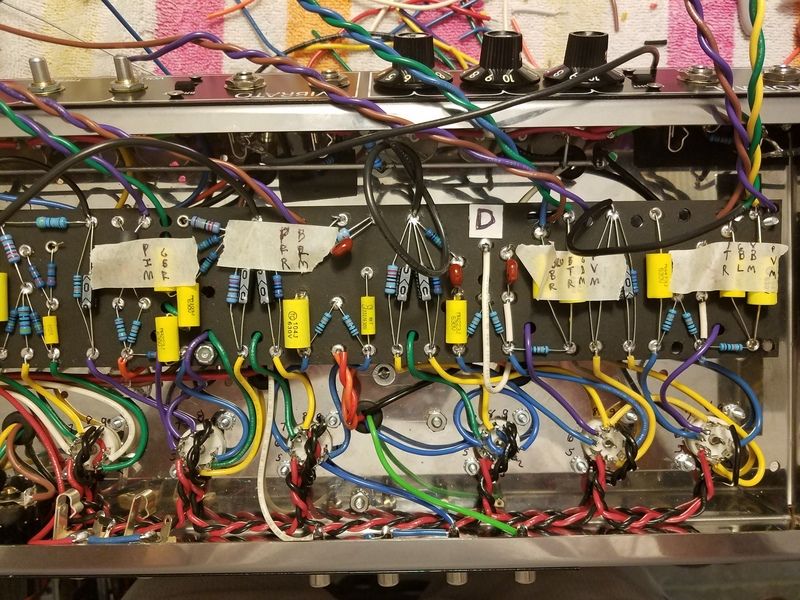
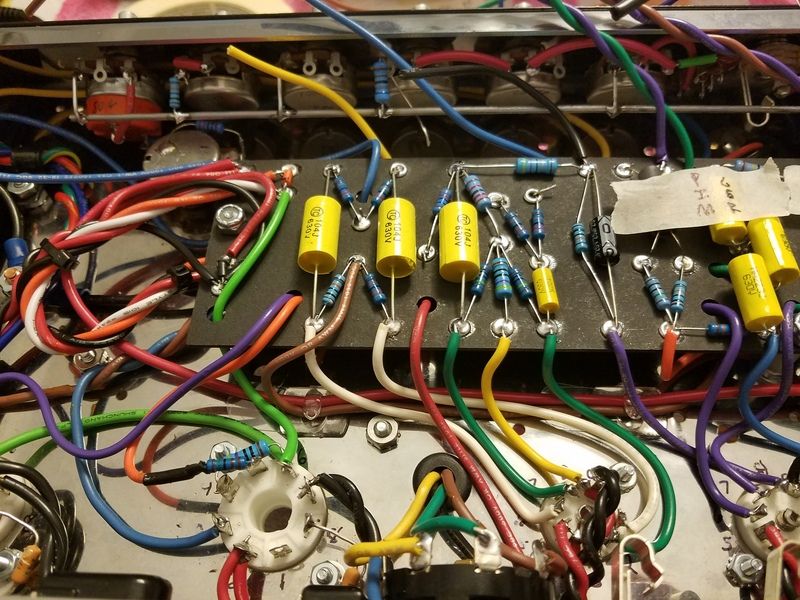
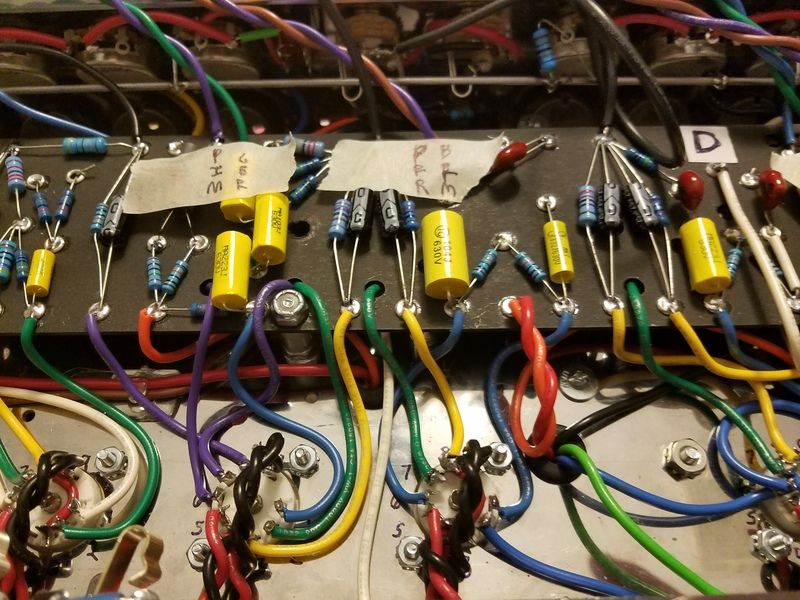
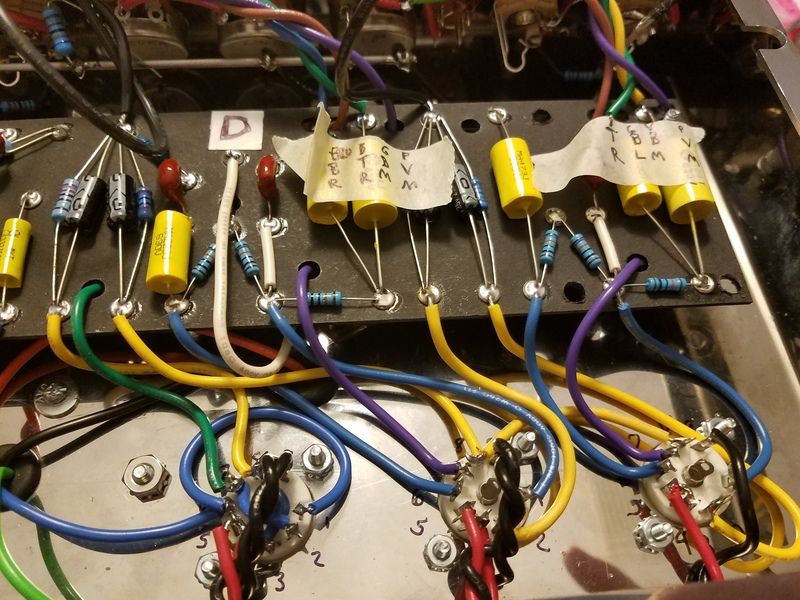
Let's build an amp! Greg's journey to electrocution

DIY Studio Stuff
Post Reply
User avatar
Greg_L
Posts: 21453
Joined: Wed Jan 04, 2017 1:07 pm
Location: Where the knuckle meets the poophole

Re: Let's build an amp! Greg's journey to electrocution

Post by Greg_L »

Getting closer....

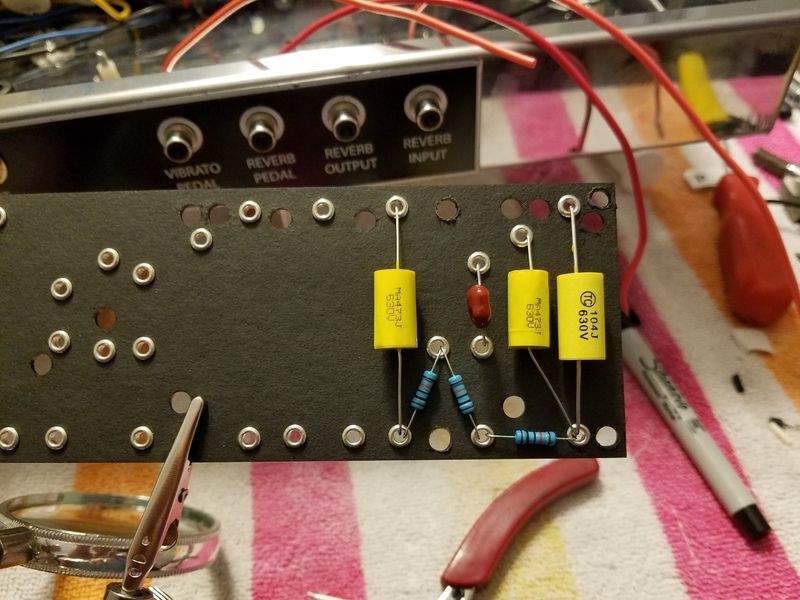
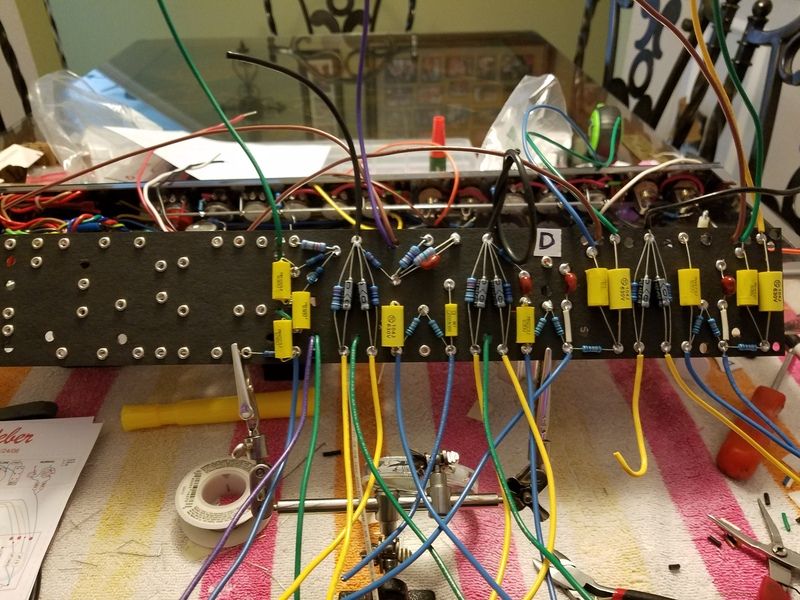
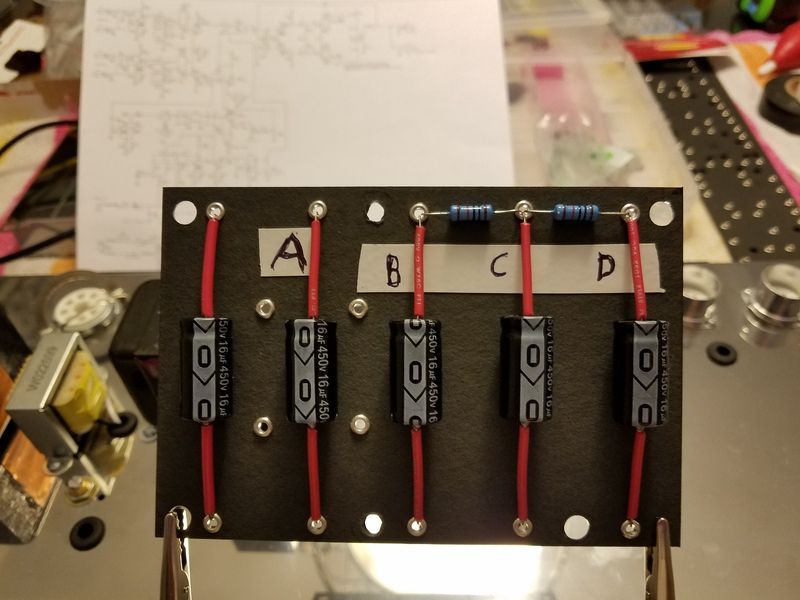
I started this late last night and just finished it up this morning. This is the filter cap board. These capacitors filter and smooth the rectified DC voltage to be usable by the rest of the amp in different areas. The little resistors are dropping resistors. They do what their name suggests - they drop voltage across the "nodes". The nodes (A,B,C, and D) are the points that feed the different areas of the amp.
Image


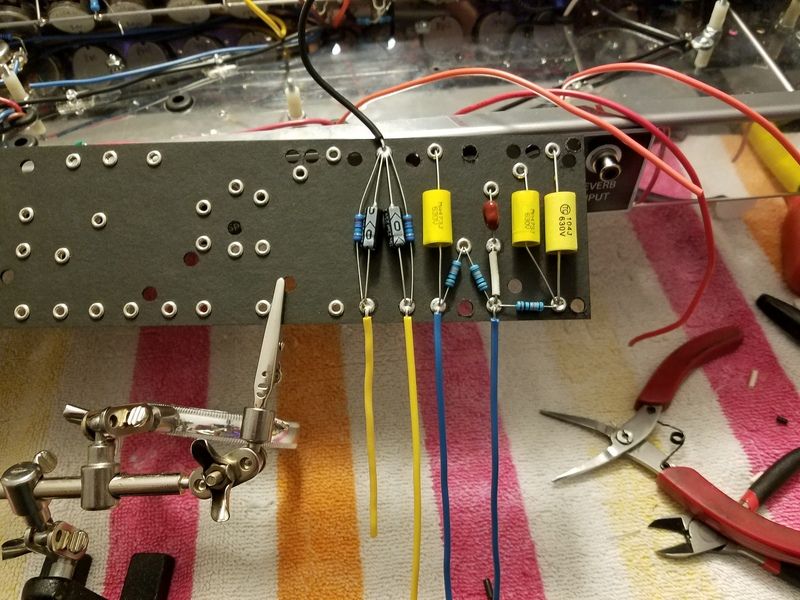
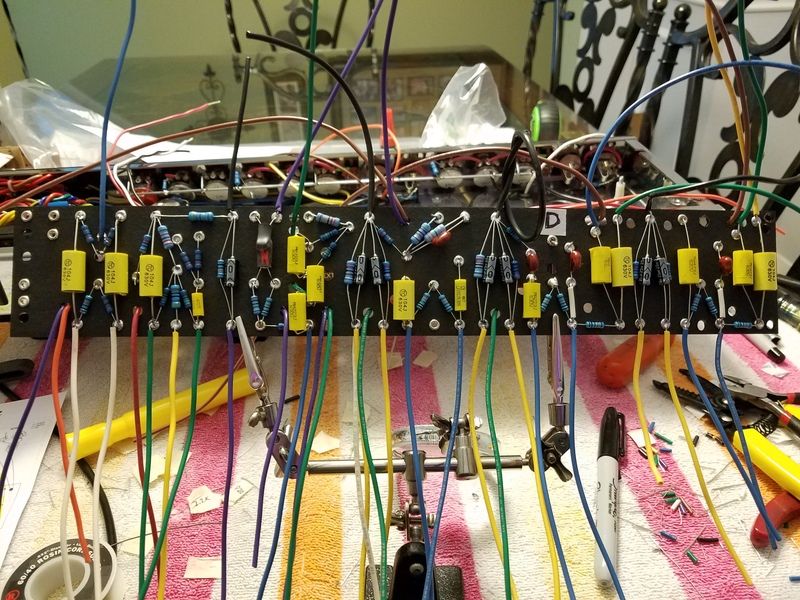
And here we go with all the wires attached. "A" will filter the first blast of juice from the rectifier, pass through the standby switch, and supply power to the primary of the output transformer. Then through the choke and on to "B" where that still very high voltage will supply power to the power tube screens, the tremolo circuit, and reverb transformer. Then it gets dropped by the first dropping resistor and "C" will provide DC voltage to the phase inverter plates. And lastly, the voltage will get dropped again on to "D" where that last bit of voltage will move on to the plates in the preamp circuit. I went rogue a little and altered the black wires -the grounds. Nodes A, B, and C are high voltage with heavy currents. I want them to ground together at the power supply grounding point. Node D is much less intense and it's strictly preamp power supply, so I want it to ground at my ground rod with the rest of the preamp circuit. Hopefully I've done this right.
Image


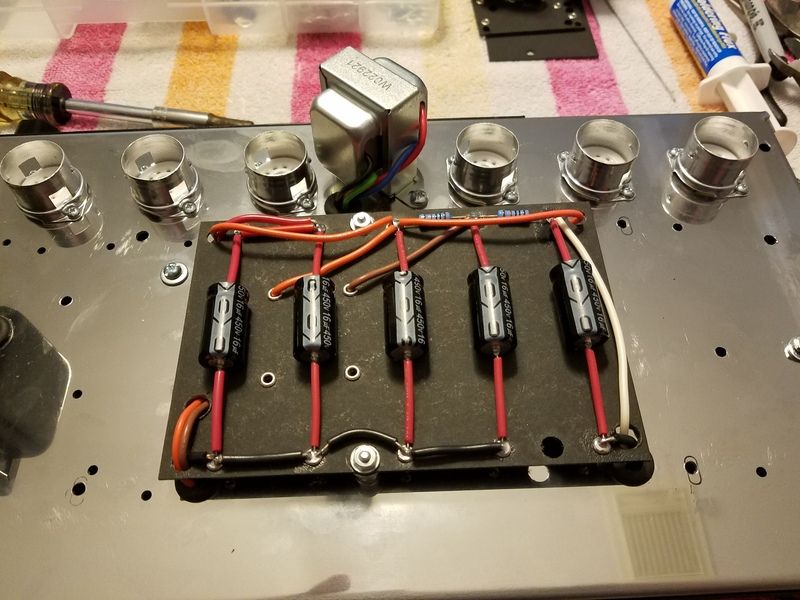
This is where the filter caps live and they will be covered by the doghouse. Right now I'm leaving it open because I'll need to test voltages in there. These are the notorious capacitors that will kill you....or at least shock the fucking shit out of you. These caps store electricity and you need to drain them before you go poking around inside of an amp. They need to be covered....but not right now.
Image


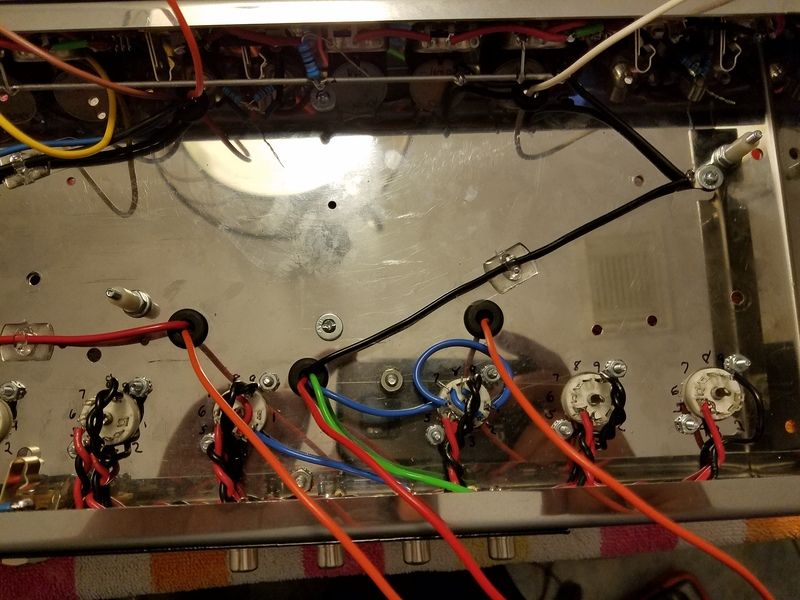
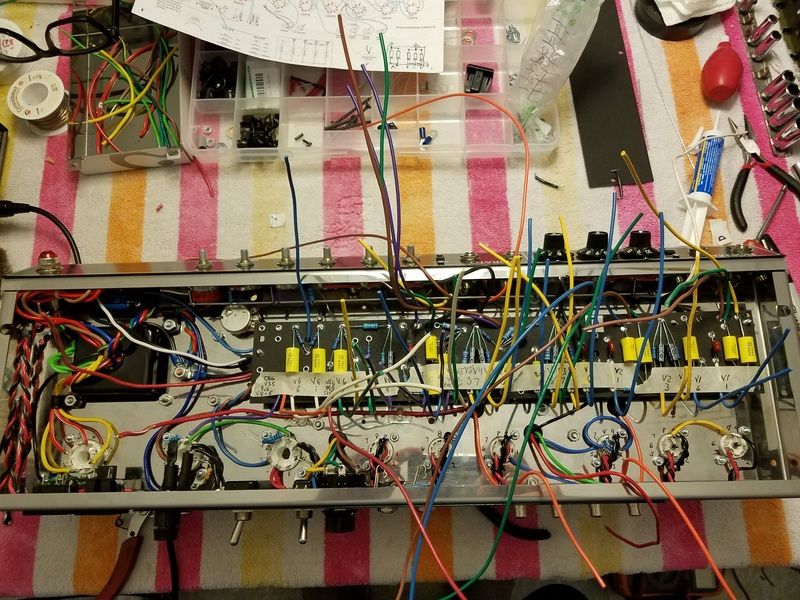
And what was previously a tidy and organized chassis is now a clusterfuck again. I left my wires pretty long. Lol. All of these wires will connect at various points on the board later. Red is my "A" wire. Orange is "B". Brown is "C". White is "D". Black is ground. Looks messy, but I know what's happening in there for now. Lol.
Image


And with that done, it's finally time to populate the turret board and start making final connections.
Rebel Yell
User avatar
Bubba
Posts: 3350
Joined: Wed Jan 04, 2017 2:45 pm
Location: Checking out my haggard face in the mirror.

Re: Let's build an amp! Greg's journey to electrocution

Post by Bubba »

Superb.
Haggard Musician :mad:
User avatar
rayc
Posts: 8948
Joined: Wed Jan 04, 2017 6:31 pm
Location: South of Bundaberg North of Brisbane

Re: Let's build an amp! Greg's journey to electrocution

Post by rayc »

My brain hurts.
Cheers
rayc
User avatar
liv_rong
Posts: 2074
Joined: Thu Jan 19, 2017 7:32 pm

Re: Let's build an amp! Greg's journey to electrocution

Post by liv_rong »

Baller.
User avatar
Greg_L
Posts: 21453
Joined: Wed Jan 04, 2017 1:07 pm
Location: Where the knuckle meets the poophole

Re: Let's build an amp! Greg's journey to electrocution

Post by Greg_L »

Now shit's getting real....

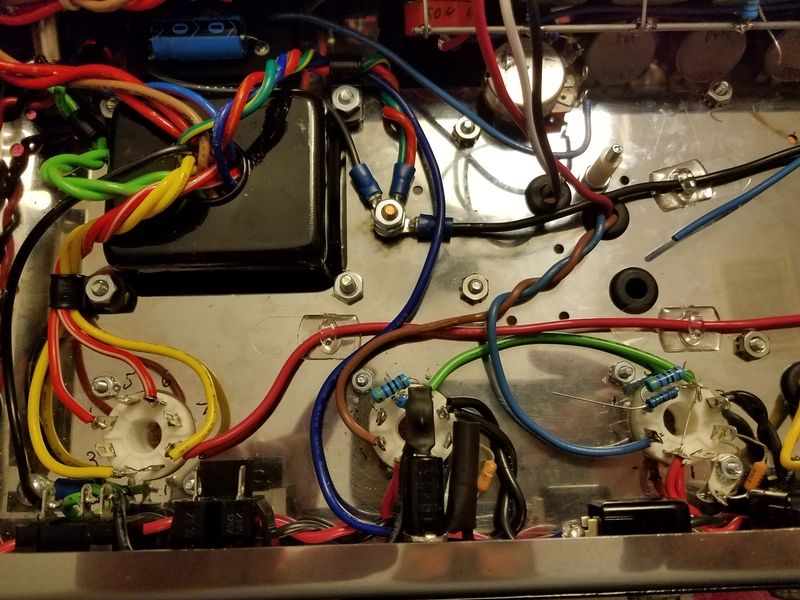
With the filter caps installed, I ran a few power supply wires that need to go down before the board goes in. My wife got me some of those command strip things. I found a way to use them.

This shows three of the major power supply ground connections. Bias supply, center taps, and first three filter node grounds. The red wire running across is the "A" power node coming right off the rectifier socket to the first filter caps.
Image

This is the other ground point. This grounds the preamps, everything on the ground rod, and the reverb tranny.
Image

So with that "layer" done, it's time to get to this thing...
Image

It's A LOT of little tiny bits and pieces, and they have to be done perfectly. There is no room for error with this part of the build. I just started one at a time from right to left.
Image

Little more...
Image

This is as far as I got and I had to call it for the night. This part of the board pretty much covers the normal channel, some of the vibrato channel first stage, and some of the reverb driver. Still a long way to go....but so far so good.
Image

And right on cue, the tip on my soldering iron is starting to erode away. It's still working but this is no time for anything less than fully functional. So tomorrow I'm gonna go find another tip. That's enough for today.
Rebel Yell
User avatar
Minerman
Posts: 2022
Joined: Wed Jan 04, 2017 3:51 pm
Location: U.S.A.
Contact:

Re: Let's build an amp! Greg's journey to electrocution

Post by Minerman »

Wow Greg, this is looking great man, & considering it's your first build, I think it looks phenomenal....

Very impressive, & I really like how you're explaining how it all works as you go along man...

Really, really cool man... :minernuggs:
Image
Gibson, Fender, Ibanez, Jackson
Ceriatone, Marshall, EVH
TC Electronic, MXR, Yamaha

My music @ Reverbnation :minernuggs:
User avatar
Greg_L
Posts: 21453
Joined: Wed Jan 04, 2017 1:07 pm
Location: Where the knuckle meets the poophole

Re: Let's build an amp! Greg's journey to electrocution

Post by Greg_L »

Minerman wrote: Mon May 14, 2018 2:42 am Wow Greg, this is looking great man, & considering it's your first build, I think it looks phenomenal....

Very impressive, & I really like how you're explaining how it all works as you go along man...

Really, really cool man... :minernuggs:
Thanks miner. I think maybe this week we'll see if it works.... :eek:
Rebel Yell
User avatar
Lt. Bob
Posts: 7092
Joined: Wed Jan 04, 2017 3:02 pm

Re: Let's build an amp! Greg's journey to electrocution

Post by Lt. Bob »

just an aside ..... those little dinky filter caps ain't gonna kill ya' ...... that's more with the big huge can caps some amps use ....... which I also don't believe are lethal seeing as how you can't find any articles about someone dying from them.

You've seen me dispute this before ....... those caps'll bite ya' pretty good and also make you damage your hand when you jerk back and slam your hand into something ...... but I personally believe the "OMG you're gonna die!!" thing to be way overblown.

As it has been from the beginning .... you're doing great work and it's fun to watch ....... you're rolling right along.
User avatar
WhiskeyJack
Site Admin
Posts: 12300
Joined: Sun Jan 12, 2014 11:48 pm
Location: Canada
Contact:

Re: Let's build an amp! Greg's journey to electrocution

Post by WhiskeyJack »

Good job Greg that thing is looking pretty amazing! Forgive my ignorace but the turret board you are building looks like it is some sort of paper or cardboard kind of looking stuff. Why not the green PCI board or whatever ?
:happytrees:
User avatar
JD01
Posts: 16510
Joined: Wed Jan 04, 2017 1:11 pm
Location: Wales, UK

Re: Let's build an amp! Greg's journey to electrocution

Post by JD01 »

Greg - are you going to take a video of the very first time you turn this on and try and play a chord?
User avatar
WhiskeyJack
Site Admin
Posts: 12300
Joined: Sun Jan 12, 2014 11:48 pm
Location: Canada
Contact:

Re: Let's build an amp! Greg's journey to electrocution

Post by WhiskeyJack »

JD01 wrote: Mon May 14, 2018 1:31 pm Greg - are you going to take a video of the very first time you turn this on and try and play a chord?
I asked him already and the answer was a pretty clear no.
:happytrees:
User avatar
Greg_L
Posts: 21453
Joined: Wed Jan 04, 2017 1:07 pm
Location: Where the knuckle meets the poophole

Re: Let's build an amp! Greg's journey to electrocution

Post by Greg_L »

Lt. Bob wrote: Mon May 14, 2018 12:29 pm just an aside ..... those little dinky filter caps ain't gonna kill ya' ...... that's more with the big huge can caps some amps use ....... which I also don't believe are lethal seeing as how you can't find any articles about someone dying from them.

You've seen me dispute this before ....... those caps'll bite ya' pretty good and also make you damage your hand when you jerk back and slam your hand into something ...... but I personally believe the "OMG you're gonna die!!" thing to be way overblown.

As it has been from the beginning .... you're doing great work and it's fun to watch ....... you're rolling right along.
Thanks man.

I think the filter cap shock thing just depends on how it gets you. If the voltage goes through your hand to ground, it'll just jolt you real bad. If for some reason it has to cross your chest to get to ground, then that can potentially fuck up your heart rhythm. That's why they say to do your tinkering with a live amp one-handed. A medical heart defibrillator kicks out between 500 and 1000 volts. An amp's power transformer can put out 600-700 volts...or more for some amps. That's well within range to jockey with your heart rhythm if it hits you right. :eep:

WhiskeyJack wrote: Mon May 14, 2018 1:22 pm Good job Greg that thing is looking pretty amazing! Forgive my ignorace but the turret board you are building looks like it is some sort of paper or cardboard kind of looking stuff. Why not the green PCI board or whatever ?
Fender amps came with these hard paper like fiberboard things. It's like plastic infused compressed paper with steel eyelets. It's fairly rigid. I suspect the Weber people wanted to keep it authentic to the original Fender amps. It's not hard to deal with.
Rebel Yell
User avatar
Greg_L
Posts: 21453
Joined: Wed Jan 04, 2017 1:07 pm
Location: Where the knuckle meets the poophole

Re: Let's build an amp! Greg's journey to electrocution

Post by Greg_L »

And for today's update....


....a little more...
Image


....a little more....
Image


....and done!!!!
Image


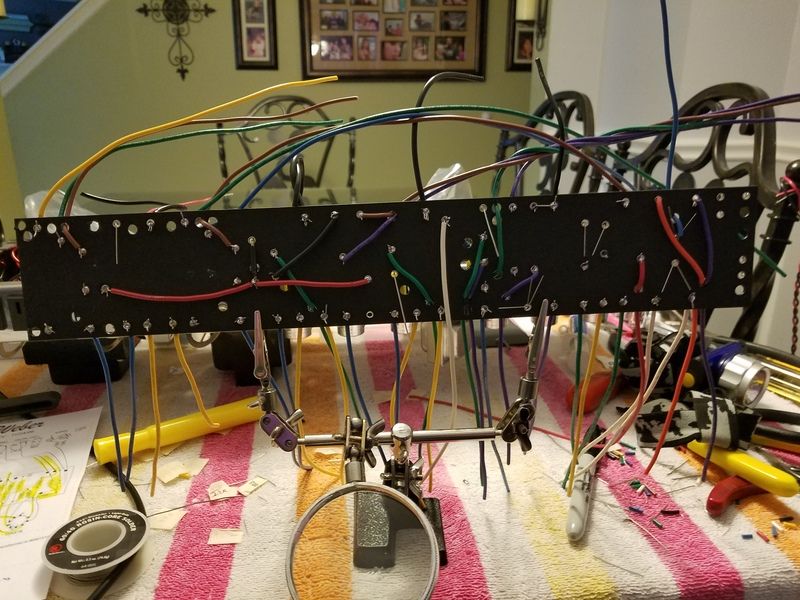
The ugly backside...
Image


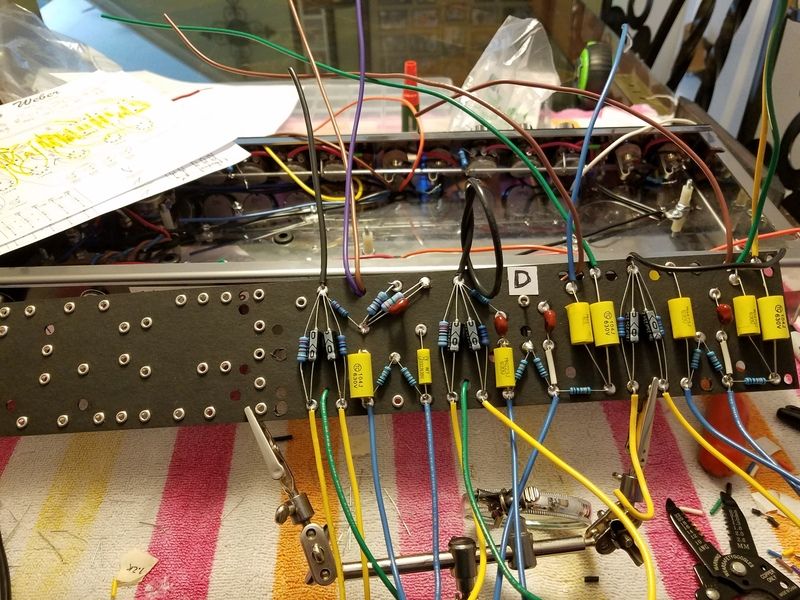
So now I'm going to go over it again with a fine tooth comb and make sure I didn't miss anything. I think I got it right. But we'll see. I know my solders are very good. My wire lengths should be more than sufficient for hook up. I used Marshall colors for the tube side wiring. Blue - plates. Green - grids. Yellow - cathodes. But I ran out of wire 3/4 through so I just freelanced the colors after that. Lol. I'll have to go through and make some notes.

So next up....a lot of wire hookups.
Rebel Yell
User avatar
Lt. Bob
Posts: 7092
Joined: Wed Jan 04, 2017 3:02 pm

Re: Let's build an amp! Greg's journey to electrocution

Post by Lt. Bob »

Greg_L wrote: Mon May 14, 2018 5:11 pm That's why they say to do your tinkering with a live amp one-handed. A medical heart defibrillator kicks out between 500 and 1000 volts. An amp's power transformer can put out 600-700 volts...or more for some amps. That's well within range to jockey with your heart rhythm if it hits you right. :eep:
I wasn't talking about a live amp ..... you'd best be careful of you're tinkering with a live amp ...... in that case you even have the possibility to get bit by wall voltage ...... which definitely can kill you although, as you said, it'd have to pass thru your heart.
I will fool with a live amp but I'm uber careful.

I'm just talking about undischarged caps when the power is off ..... almost by definition it can't go thru your heart because you have to short the leads of the cap with your skin ..... butthere is a full-blown OMG reaction about those caps even with power off and I say it's a way overreaction

These are nice pics man ..... easy to see what you're doing
User avatar
rayc
Posts: 8948
Joined: Wed Jan 04, 2017 6:31 pm
Location: South of Bundaberg North of Brisbane

Re: Let's build an amp! Greg's journey to electrocution

Post by rayc »

All as clear as mud for my mind - so much so that the only question that came to mind was - why right to left?
Cheers
rayc
User avatar
Greg_L
Posts: 21453
Joined: Wed Jan 04, 2017 1:07 pm
Location: Where the knuckle meets the poophole

Re: Let's build an amp! Greg's journey to electrocution

Post by Greg_L »

Lt. Bob wrote: Mon May 14, 2018 8:47 pm

I wasn't talking about a live amp ..... you'd best be careful of you're tinkering with a live amp ...... in that case you even have the possibility to get bit by wall voltage ...... which definitely can kill you although, as you said, it'd have to pass thru your heart.
I will fool with a live amp but I'm uber careful.

I'm just talking about undischarged caps when the power is off ..... almost by definition it can't go thru your heart because you have to short the leads of the cap with your skin ..... butthere is a full-blown OMG reaction about those caps even with power off and I say it's a way overreaction

These are nice pics man ..... easy to see what you're doing
Right right right. I can juggle these filter caps and nothing will happen because they've never been charged. I can touch them all I want. Once they've been charged though, they store that charge for a little while. They'll slowly discharge by themselves or you can discharge them with a jumper wire, but they are pretty "hot" right when you turn an amp off. And that's when you have to be careful with them. Like say you're diagnosing an amp, you play it a bit, and turn it off to get to work. Those caps will be charged. They can bite you pretty good. They discharge on their own pretty quickly though.
Rebel Yell
User avatar
Greg_L
Posts: 21453
Joined: Wed Jan 04, 2017 1:07 pm
Location: Where the knuckle meets the poophole

Re: Let's build an amp! Greg's journey to electrocution

Post by Greg_L »

rayc wrote: Mon May 14, 2018 10:49 pm All as clear as mud for my mind - so much so that the only question that came to mind was - why right to left?
That's just the way I had the amp oriented. The signal flows from right to left the way it was sitting on the table.
Rebel Yell
User avatar
einstein magoo
Posts: 407
Joined: Sun Feb 26, 2017 3:05 pm
Location: OHIO

Re: Let's build an amp! Greg's journey to electrocution

Post by einstein magoo »

Man you have populated the shit out of that board! Nice work!
User avatar
Greg_L
Posts: 21453
Joined: Wed Jan 04, 2017 1:07 pm
Location: Where the knuckle meets the poophole

Re: Let's build an amp! Greg's journey to electrocution

Post by Greg_L »

einstein magoo wrote: Tue May 15, 2018 1:22 pm Man you have populated the shit out of that board! Nice work!
Thanks. I'm in the home stretch.


This morning's work...

The board is in and ready to be connected. Lots of wires....
Image


This is where things get maddening. I took great care in being organized and thoughtful and keeping things nice and tidy. Then the board happened. This jumble of wires are from the rectifier to the "A" node, to the standby switch, through the choke, to the "B" node, and the output transformer primary is in there too. All of this shit needs to connect on the end of the board. I tried to keep it as organized and tidy as I could. I could have shortened the wires some, not much, but I wanted that bundle to be "flexible" enough to allow the board to be lifted while it's all still connected. But it's all there, all hooked up. The orange and purple wires are the power tube grids. The lime green is the screen.
Image

And the rest of the tube sockets.
Image

Image

Image

Image


The location and layout of the board leaves me with no choice but to have some tube socket wires crossing each other. I don't think that will be a huge problem as real Deluxe Reverbs look like a blind five year old wired them up inside, but we'll see. As long as nothing is crossing heater wires, I should be okay. And nothing is.

So now I've definitely got to get a new soldering iron tip. So I'm off to Harbor Freight for that thing. All that's left now are wiring the pots and shielded cable for the input jacks, and maybe by tonight, I'll be ready to fire it up!!!!
Rebel Yell
User avatar
WhiskeyJack
Site Admin
Posts: 12300
Joined: Sun Jan 12, 2014 11:48 pm
Location: Canada
Contact:

Re: Let's build an amp! Greg's journey to electrocution

Post by WhiskeyJack »

Thing of beauty buddy boy. :coolstorybro: :coolstorybro: :happytrees:
:happytrees:
Post Reply